 Save to Pinterest
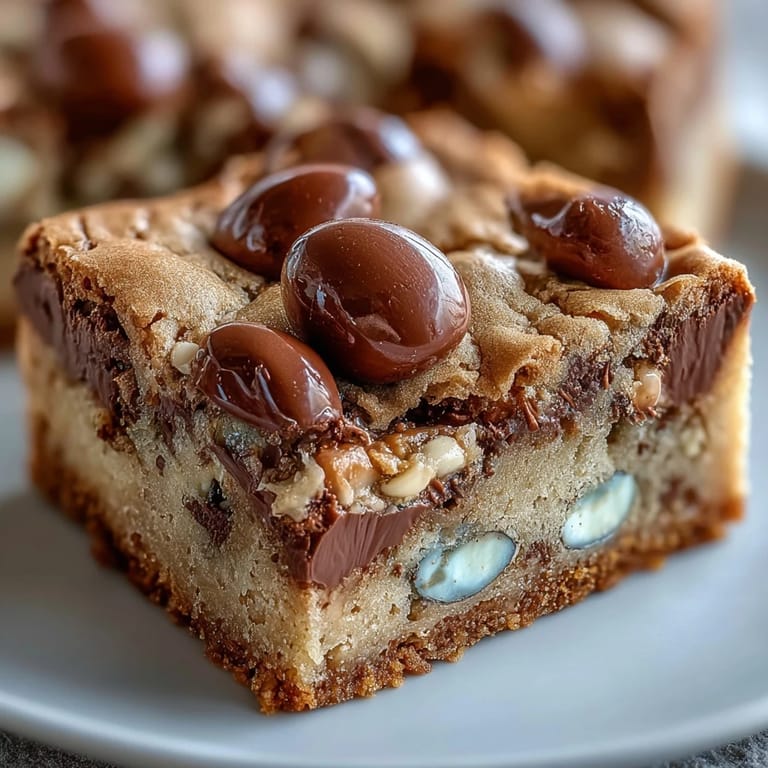
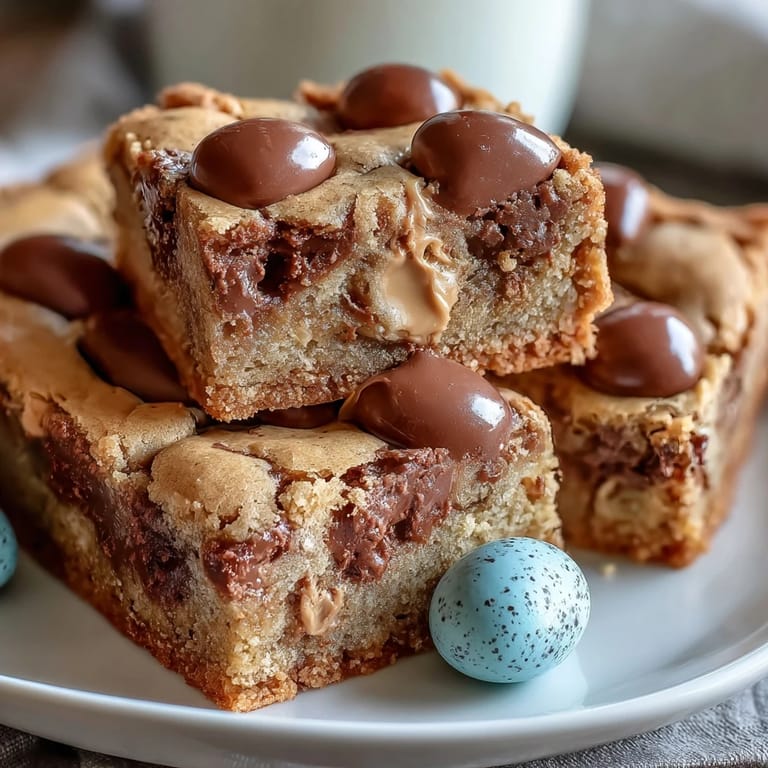
 The scent of peanut butter always reminds me of spring mornings: sunlight creeping through kitchen windows as I search for colorful Easter egg candies I've hidden from myself, hoping no one else finds them first. The idea for these Peanut Butter Easter Egg Cookie Bars emerged one breezy April afternoon, not from tradition but from a craving for chewy bars and the fun crunch of chocolate eggs. With soft dough and playful bursts of candy color, there's a childlike joy to mixing them together. Sometimes I catch myself humming, enjoying how the melted butter makes everything blend so smooth that even mixing feels relaxing. If you've ever needed dessert to brighten the room before friends arrived, these bars practically glow on the tray.
One spring I baked a double batch for my neighbor's garden brunch, worried the candies would melt unevenly, but laughter filled the kitchen when she proudly showed off their vibrant tops—our simple dessert became the centerpiece. Later that week, we'd sneak leftovers with mugs of coffee, plotting ways to swap candies for every possible holiday. These cookie bars have a knack for breaking the ice, even when you don't know everyone well. Sometimes the best kitchen moments are just a shared grin and chocolate-stained fingers. Every time I make these, I remember that day's warmth and how easy it was to bring everyone together.
Ingredients
- Unsalted butter: Melting it and letting it cool slightly prevents greasy bars and ensures every bite is soft, learned after many trials.
- Creamy peanut butter: A good, thick peanut butter keeps the dough tender—avoid natural varieties or the bars crumble too much.
- Light brown sugar: The sticky sweetness lends moisture and caramelly depth, balancing the candy's sharp crunch.
- Granulated sugar: Just enough for crisp edges, though skipping it leaves the bars a bit bland.
- Large eggs: Room temperature eggs whisk in easier and help prevent curdling.
- Vanilla extract: Added for warmth—if you double it, the bars become even more comforting.
- All-purpose flour: Sift lightly for airy bars; pack too tightly and the result is dense.
- Baking powder: For a gentle lift, learned after one flat batch that was still delicious but less fun.
- Baking soda: Just a dash, helps balance acidity and preserves chewiness.
- Salt: Pinch for balance; it's surprising how missing it makes everything sweeter but muddled.
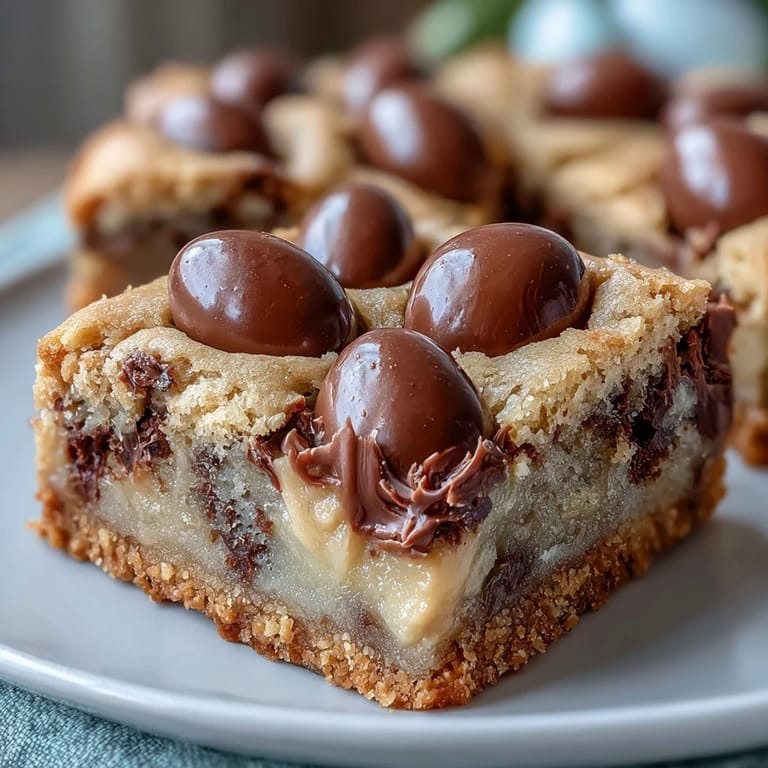
- Easter egg chocolate candies: Tossed in just before baking, they're the visual highlight and provide crisp bites.
- Semi-sweet chocolate chips (optional): Extra chocolate for those who can't resist—though I've sometimes skipped them entirely.
Tired of Takeout? 🥡
Get 10 meals you can make faster than delivery arrives. Seriously.
One email. No spam. Unsubscribe anytime.
Instructions
- Prep your pan:
- Line a 9x9-inch baking pan with parchment, letting the sides overhang so you can lift out the bars later—the rustle of paper means you're nearly ready to bake.
- Mix wet ingredients:
- In your largest bowl, whisk melted butter, peanut butter, and sugars until glossy and fragrant—the brown sugar melts, and it feels like making cookie dough with a secret twist.
- Add eggs and vanilla:
- Crack in the eggs, splash in the vanilla, and whisk until everything is silky smooth, embracing the thick peanut aroma. The mixture will look slightly lighter, and sometimes I pause just to inhale.
- Blend dry ingredients:
- In a separate bowl, whisk flour, baking powder, baking soda, and salt—the powdery cloud is oddly satisfying and reminds me to tap excess flour off the spoon.
- Combine wet and dry:
- Fold the dry mixture gently into the wet, using a spatula; don't overmix, or the bars turn cakey rather than chewy.
- Stir in candies and chips:
- Add Easter egg candies and chocolate chips, then fold so candies scatter throughout—hearing them clink in the bowl always makes me smile.
- Spread and decorate:
- Scrape the dough evenly into your prepared pan and dot extra candies on top—there's no wrong way to make them look festive.
- Bake:
- Slide into a 350°F oven; watch the edges turn golden, while the center stays soft—check after 22 minutes if you like gooey middles.
- Cool and slice:
- Let bars cool fully in the pan, then lift out with parchment and use a sharp knife for neat squares. Sometimes the anticipation makes waiting harder than the baking itself.
 Save to Pinterest
 A late afternoon in April, I watched a toddler's eyes light up as he selected the largest piece from the tray, convinced the brightest egg would taste best. Around the table, grown-ups nibbled and debated which candy color was luckiest, turning dessert into a shared ritual. That day, these simple bars became an invitation to linger and laugh. Not just sweet, but a reason to prolong the party. It was proof that food sometimes starts small and ends up lasting as a memory.
Baking in Spring: Making It Festive
The trick with these bars is don't overthink the decoration; I scatter candies however my mood strikes, and somehow they always look cheerful. Spring sunlight catches the glossy shell colors and makes the dessert even more inviting. Mixing in different candies means the bars never look the same twice, keeping things playful. Kids love helping, and even half-melted candies just add to their charm. It's one of the easiest ways to bring a little celebration to your kitchen.
Keeping Cookie Bars Fresh
I've found the secret to lasting chew is wrapping cooled bars snugly in a layer of parchment and storing them in an airtight container. Too much air and they'll dry out by day three—though they rarely last that long at my house. You can freeze them if you need to plan ahead, and the color still pops when thawed. Bars taste just as good with coffee as with milk, making them a flexible treat. If you're baking for a crowd, doubling this recipe is a snap.
Troubleshooting: Easy Fixes for Cookie Bars
Sometimes the edges bake faster than the center; a loose foil tent for the last 5 minutes helps even things out without overbrowning. If your dough feels dry, adding a spoonful of extra peanut butter solves the problem instantly. Always check candies for allergens, as brand ingredients can change. I've learned to keep the bars in the pan until fully cooled for easier slicing.
- Don't skip parchment—removal is so much easier.
- Cool completely before slicing for the best texture.
- Use different candies for new occasions—snack-size bars work for after-school treats.
 Save to Pinterest
 May these bars brighten your spring table and bring cheerful bites to every celebration. Sharing them always feels like giving a little piece of kitchen joy.
Recipe FAQs
- → How do you achieve soft, chewy bars?
Use melted butter and creamy peanut butter, and avoid over-mixing the dough. Bake until edges are set but center remains soft.
- → Can I substitute Easter egg candies?
Yes, regular chocolate candies or chocolate chips work well. Choose your favorite mix-ins for year-round enjoyment.
- → How should the bars be stored?
Store in an airtight container at room temperature for up to four days to maintain freshness.
- → What tools are needed?
A 9x9-inch baking pan, mixing bowls, whisk, spatula, and parchment paper make prep and baking easy.
- → Are there allergy concerns?
Bars contain peanuts, eggs, dairy, gluten, and possibly soy; always check candy labels for allergens.