 Save to Pinterest
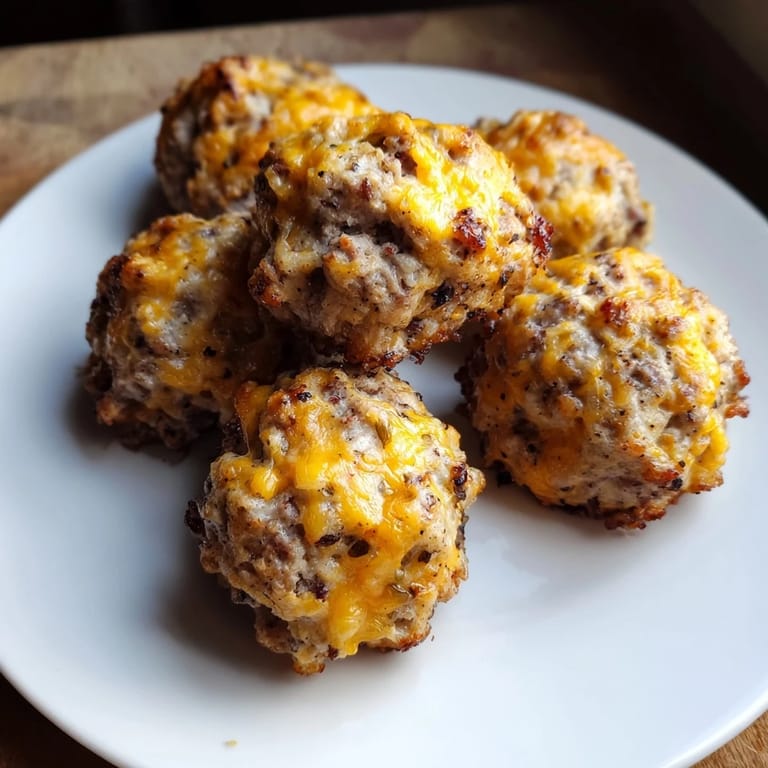
 I wasn't planning to bring anything to my neighbor's game night, but then I opened the fridge and saw leftover rotisserie chicken and a half-used tube of breakfast sausage. Twenty minutes later, I was pulling golden, crispy-edged balls out of the oven, and by the time I arrived, they were still warm in the dish. Everyone kept asking for the recipe, and I realized I'd stumbled onto something that felt both nostalgic and completely my own.
The first time I made these for a potluck, I watched a friend's kid grab three in a row, and his mom didn't even stop him. She just looked at me and said, this is exactly what I needed today. That's when I knew these weren't just another appetizer, they were the kind of food that makes people feel cared for without trying too hard.
Ingredients
- Cooked chicken breast, shredded: Rotisserie chicken works perfectly here and saves you from boiling and shredding from scratch, though leftover grilled chicken adds a subtle smokiness.
- Uncooked breakfast sausage: This is where the moisture and richness come from, so don't skip it or swap it for pre-cooked links.
- Sharp cheddar cheese, shredded: Sharp cheddar melts into pockets of flavor, and I've learned that pre-shredded works fine, but block cheese you shred yourself melts more evenly.
- Bisquick or baking mix: This holds everything together without making the balls dense, and it gives them that signature tender crumb.
- Whole milk: Just enough to bind the mixture, though I've used buttermilk in a pinch and loved the slight tang it added.
- Garlic powder, onion powder, black pepper, smoked paprika: These seasonings build a savory base that doesn't overpower the chicken and sausage, and the paprika adds a whisper of warmth.
Tired of Takeout? 🥡
Get 10 meals you can make faster than delivery arrives. Seriously.
One email. No spam. Unsubscribe anytime.
Instructions
- Preheat and prep:
- Set your oven to 350°F and line a baking sheet with parchment paper. This step matters because parchment keeps the bottoms from sticking and makes cleanup almost effortless.
- Combine everything:
- In a large bowl, mix the chicken, sausage, cheese, Bisquick, and seasonings until it looks like a shaggy, cohesive mass. Add the milk and use your hands to bring it all together, the warmth of your palms helps the fat in the sausage distribute evenly.
- Shape the balls:
- Scoop out tablespoon-sized portions and roll them between your palms into rounds. I like mine about 1.5 inches across, big enough to feel substantial but small enough to pop in your mouth.
- Bake until golden:
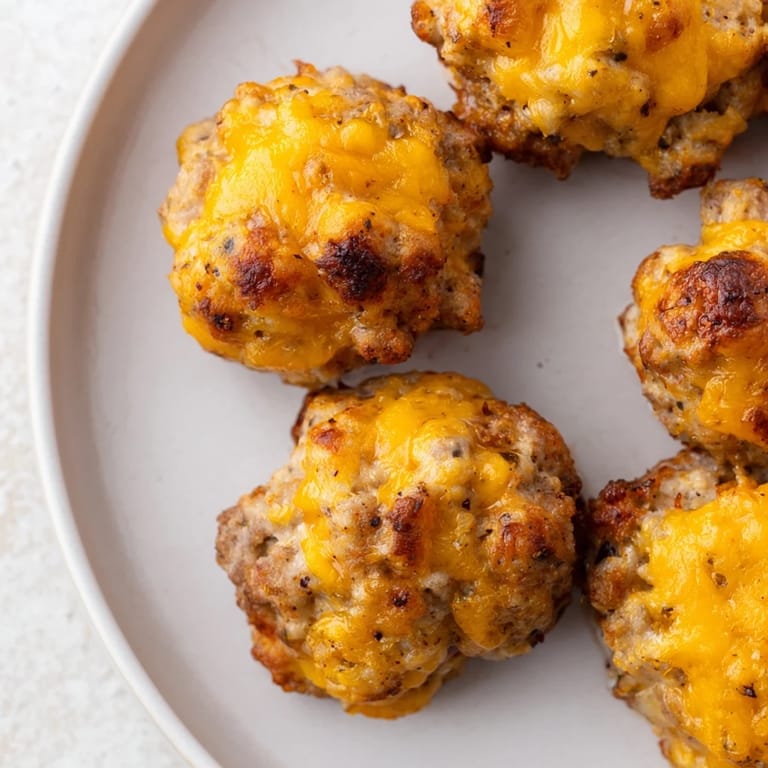
- Arrange the balls on your prepared sheet with a little space between each one, then bake for 22 to 25 minutes. You'll know they're ready when the tops are golden and the edges look slightly crisp.
- Cool and serve:
- Let them rest for five minutes so the cheese sets and the interiors firm up. Serve them warm with whatever dipping sauce feels right that day.
 Save to Pinterest
 One evening, I reheated a few of these in the toaster oven and ate them standing at the counter with a smear of honey mustard. My husband walked in, grabbed one without asking, and said, we should make these every week. It's those quiet kitchen moments that remind me why I cook.
Make-Ahead Magic
You can shape the balls and freeze them on a tray, then transfer to a freezer bag once solid. When you're ready, bake them straight from frozen, adding about five extra minutes to the timer. I've done this before hosting brunch, and it felt like having a secret weapon in the freezer.
Flavor Swaps That Work
Pepper jack or smoked gouda change the whole vibe without changing the method. I've also stirred in a handful of chopped green onions or a pinch of crushed red pepper when I wanted a little heat, and every time, it worked. Don't be afraid to follow your instincts here.
Serving Suggestions
These are perfect warm, but they're also great at room temperature, which makes them ideal for tailgates or picnics. I've served them with ranch, barbecue sauce, and even a spicy aioli, and each pairing brought out something different.
- Set out a few dipping options and let people choose their own adventure.
- Pair them with a simple green salad if you want to call it dinner.
- Leftovers, if there are any, reheat beautifully in a 300°F oven for about 10 minutes.
 Save to Pinterest
 These balls have become my go-to when I want to show up with something that feels homemade without the stress. They're proof that the best recipes are the ones you can make with what's already in your kitchen.
Recipe FAQs
- → Can turkey sausage be used instead of pork?
Yes, turkey sausage provides a leaner alternative while maintaining the savory flavor balance in the dish.
- → What is the role of Bisquick in this dish?
Bisquick acts as a versatile baking mix that helps bind the ingredients and gives structure to the balls when baked.
- → How can the flavor be varied?
Try swapping cheddar for pepper jack or gouda, or adding red pepper flakes for a spicy kick to customize the taste.
- → What is the best way to bake these balls evenly?
Arrange the balls spaced slightly apart on a lined baking sheet and bake at 350°F until golden and cooked through.
- → Can these be prepared ahead of time?
Yes, they can be made in advance and reheated in the oven to retain their texture and warmth.