 Save to Pinterest
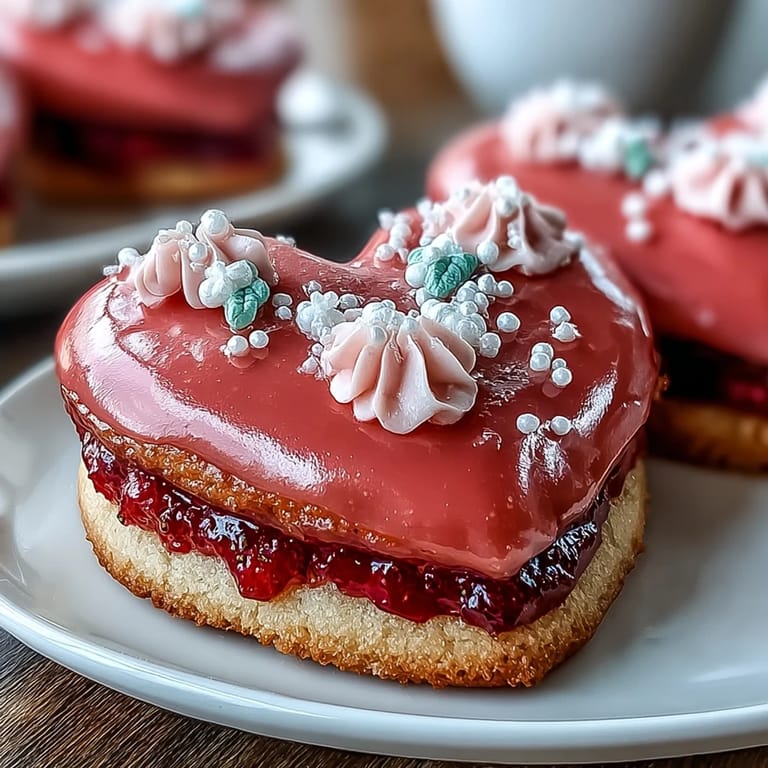
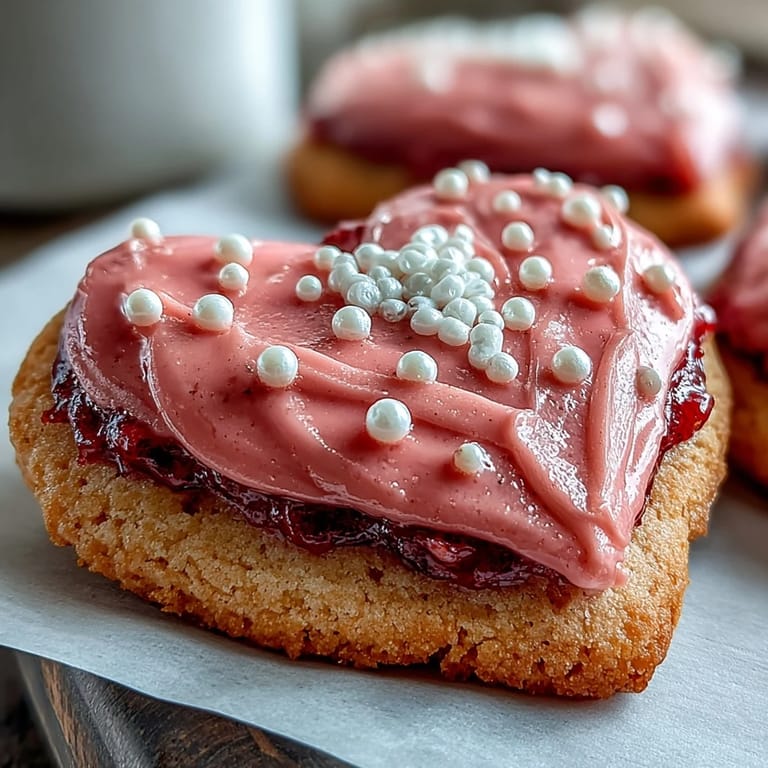
 There's something about standing in the kitchen on a gray February afternoon, strawberry dust coating your fingers, that makes you believe in small gestures again. I'd been scrolling through old Valentine's cards when it hit me—why not make something that actually tastes like the effort you're putting in? These strawberry sugar cookies came together almost by accident, really, when I decided freeze-dried strawberries belonged in cookie dough instead of just sitting in a pantry jar. The first batch was more pale pink than I expected, but the moment someone bit into one and their eyes lit up at that subtle strawberry flavor, I knew I'd stumbled onto something worth repeating.
Last year I made a double batch for a small dinner party, and watching four different people decorate their own cookies with the pink icing turned into this unexpectedly joyful hour of chatting and laughing over piping bags. Someone messed up their heart shape completely and just wrote "love" in icing instead, and honestly that became everyone's favorite cookie of the night. It made me realize these aren't just treats—they're an invitation to slow down together.
Ingredients
- All-purpose flour (2 ½ cups): This is your structure; I've learned it needs to be whisked with the other dry ingredients so the baking powder distributes evenly and you don't get dense pockets in your cookies.
- Baking powder (½ tsp): Just enough to give these cookies a tender crumb without making them cake-like.
- Salt (¼ tsp): Non-negotiable for bringing out the subtle strawberry flavor.
- Unsalted butter (¾ cup), softened: Room temperature butter is essential—cold butter fights back when you're creaming, and you'll lose that fluffy texture that makes these special.
- Granulated sugar (1 cup): This sweetness balances the slight tartness of the strawberries beautifully.
- Large egg, room temperature: Temperature matters here because cold eggs don't emulsify properly with the butter mixture.
- Pure vanilla extract (1 tsp): The backbone of cookie flavor; never skip this step.
- Almond extract (½ tsp, optional): This tiny amount whispers beneath the strawberry flavor in the most elegant way.
- Freeze-dried strawberries, finely ground (¼ cup): The star ingredient that makes these cookies different—grind them fine enough that they dissolve into the dough and tint it the palest pink.
- Milk (1–2 tbsp, as needed): Keep this on hand because humidity affects dough texture more than recipes admit.
- Powdered sugar, sifted (3 cups): Sifting removes lumps that would make your icing grainy and disappointing.
- Egg whites (2 large) or meringue powder (4 tbsp): I prefer meringue powder for food safety, especially when these are gifts.
- Lemon juice (½ tsp): This adds brightness to the icing and helps it set properly.
- Vanilla extract (½ tsp): A different vanilla note than the cookies themselves, adding depth to the icing.
- Gel food coloring in pink or red (optional): Gel colors won't thin out your icing the way liquid food coloring does.
Tired of Takeout? 🥡
Get 10 meals you can make faster than delivery arrives. Seriously.
One email. No spam. Unsubscribe anytime.
Instructions
- Whisk your dry ingredients together:
- In a medium bowl, combine the flour, baking powder, salt, and finely ground freeze-dried strawberries, whisking them together for about 30 seconds so the leavening agent and strawberry powder are completely distributed. This step prevents streaks of baking powder taste that would ruin the delicate strawberry flavor.
- Cream the butter and sugar:
- In a large bowl with your electric mixer on medium speed, beat the softened butter and granulated sugar for 2 to 3 minutes until the mixture is noticeably lighter in color and fluffy, almost mousse-like. You'll see it transform from dense to pale, and this aeration is what makes the cookies tender instead of dense.
- Add the egg and extracts:
- With the mixer still going, add the room-temperature egg, vanilla extract, and almond extract if you're using it, mixing until the batter looks smooth and uniform. Don't overmix—you're looking for everything to be incorporated and glossy, not broken or separated.
- Gently incorporate the dry mixture:
- Switch to a lower speed and gradually add the dry ingredients in two or three additions, mixing just until you don't see streaks of flour anymore. Stop as soon as the dough comes together—overmixing develops gluten and makes cookies tough, which is the opposite of what we want.
- Adjust dough consistency:
- If the dough feels dry or crumbly, add milk one tablespoon at a time until it holds together without being sticky or greasy. The dough should feel soft but not wet, with a texture somewhere between soft play-dough and butter.
- Chill the dough:
- Divide the dough in half, flatten each half into a disc, wrap tightly in plastic wrap, and refrigerate for at least 1 hour, or up to overnight. Cold dough is forgiving dough—it won't stick to your rolling pin and will hold its shape when you cut it.
- Prepare to bake:
- Preheat your oven to 350°F (175°C) and line your baking sheets with parchment paper while the dough chills. This small act of preparation prevents the scrambling that happens when you're trying to get cookies into the oven.
- Roll and cut:
- On a lightly floured surface, roll the chilled dough to about ¼-inch (6 mm) thickness—thicker than this and they stay cake-like, thinner and they become brittle. Using a heart-shaped cutter or any Valentine's shape you love, cut out the cookies and arrange them on your prepared baking sheets about 2 inches apart to allow for gentle spreading.
- Bake until golden at the edges:
- Bake for 8 to 10 minutes, watching carefully so the edges just barely turn golden while the centers still look slightly underdone. They continue to cook as they cool, and this is the secret to that tender texture that makes people close their eyes when they bite into one.
- Cool completely:
- Transfer the baking sheets to a wire rack and let the cookies cool completely before decorating—about 30 minutes. Decorating warm cookies is a lesson I learned the hard way, watching icing melt into puddles.
- Make the royal icing:
- In a large, completely clean bowl, beat the egg whites (or meringue powder mixed with water) and lemon juice until frothy, then gradually add the sifted powdered sugar and vanilla extract, beating on low speed until the icing is smooth, glossy, and thick. The icing should be stiff enough to hold peaks but loose enough to spread—like thick sour cream.
- Color your icing:
- Add gel food coloring a tiny drop at a time, stirring after each addition, until you reach the shade of pink or red you want. Gel colors are forgiving because you can always add more, but you can't take them out.
- Adjust for decorating:
- For piping clean outlines, the icing should be thick and hold its shape; for flooding (filling in), thin it slightly with a few drops of water until it flows but doesn't run off the cookies. Keep these two consistencies separate if you're doing detailed work.
- Decorate and set:
- Using a small piping tip or even a toothpick, decorate the cooled cookies however your heart desires, then let the icing dry completely—at least 2 hours, though overnight is even better. Only then should you stack or store them, because icing that hasn't fully set will stick to everything.
 Save to Pinterest
 There's a moment on Valentine's Day morning when you open a box of these cookies and the pale pink catches the light, and you remember why small things made with care matter so much. These aren't just sugar cookies—they're a quiet way of saying you were worth the extra hour of my time.
The Secret Life of Freeze-Dried Strawberries
I discovered freeze-dried strawberries by accident while browsing the bulk section of a grocery store, and they've changed how I think about fruit flavor in baking. Unlike fresh strawberries, which are mostly water and turn mushy or weepy in dough, freeze-dried strawberries have all the flavor concentrated in a lightweight, shelf-stable form. When you grind them fine, they practically dissolve into your dough, adding both color and a bright strawberry note without any of the moisture problems that come with fresh or jam. They're also less expensive than you'd expect and last forever in a sealed container, so it's worth keeping a bag on hand for cookies, shortcakes, or even ice cream.
Why Royal Icing Is Worth Learning
The first time I made royal icing, I thought it was unnecessarily fussy—whipping egg whites, measuring powdered sugar to the gram, adjusting consistency with water droplets. Now I can't imagine decorating cookies any other way because it delivers something fresh icing or buttercream simply can't: a pristine, glossy finish that hardens to a delicate crunch. It's also surprisingly forgiving once you understand that it's really just a simple science of air, sugar, and liquid in the right proportions. The icing also keeps for days in an airtight container, so you can make it ahead and decorate whenever inspiration strikes.
Storage and Keeping
These cookies are the rare kind that actually improve slightly with a day of rest, as the flavors meld and the texture settles into perfect tenderness. Store them in an airtight container at room temperature, and they'll stay fresh and delicious for up to five days—longer if you separate layers with parchment paper to prevent icing from sticking. If you're baking ahead for a special occasion, the unfrosted cookies freeze beautifully for up to a month; just thaw them at room temperature before decorating, and no one will know they weren't made that morning.
- Keep a small packet of silica gel in the storage container if your kitchen is humid, so the icing stays crisp instead of softening.
- If you want to gift these cookies, layer them in a pretty box or jar with parchment between each layer to prevent the icing from chipping.
- Don't refrigerate these cookies—condensation will make the icing weep and the texture will suffer.
 Save to Pinterest
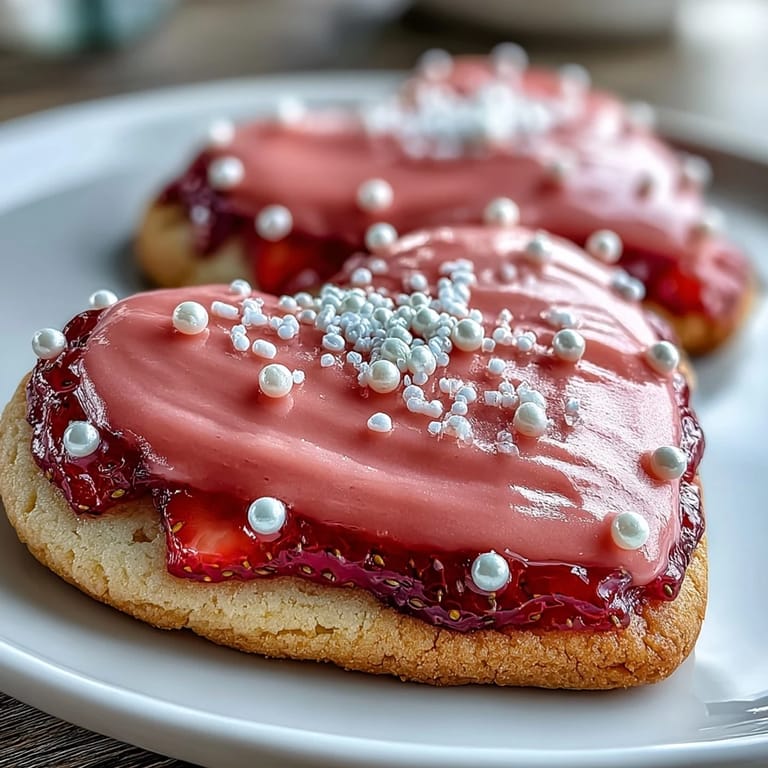
 These strawberry sugar cookies are proof that the best gifts from the kitchen are the ones made with intention and a little bit of mess along the way. Bake them knowing that someone will remember not just the taste, but the care you put into every heart-shaped bite.
Recipe FAQs
- → How is strawberry flavor incorporated into the cookies?
Finely ground freeze-dried strawberries are mixed into the flour blend, providing a natural, concentrated fruit taste without extra moisture.
- → What is the purpose of chilling the dough before baking?
Chilling firms up the dough for easier rolling and cutting, and helps maintain shape during baking, resulting in a tender texture.
- → How do I achieve the glossy finish on the icing?
Beating powdered sugar with egg whites or meringue powder until smooth creates a shiny, crisp royal icing suitable for decorating.
- → Can almond extract be omitted or substituted?
Yes, almond extract is optional and can be left out or replaced with a complementary flavor like additional vanilla.
- → How should the decorated cookies be stored?
Store in an airtight container at room temperature for up to 5 days to preserve freshness and icing texture.