Save to Pinterest
 My sister texted me a photo of a cake she'd seen on her friend's Instagram—soft layers of pink melting into yellow like a spring sunset—and asked if I could recreate it for her engagement party. I'd never attempted an ombre cake before, but something about those gentle pastel gradients pulled me in. Three hours later, standing in my kitchen with buttercream smeared on my apron and colored batter staining my fingertips, I realized this wasn't just another layer cake. It was a puzzle that actually tasted incredible.
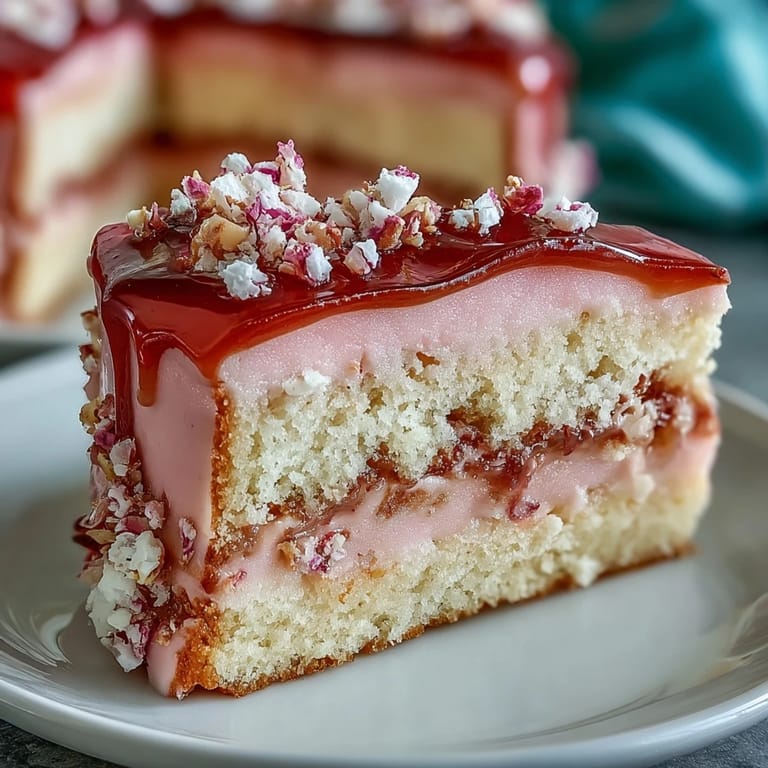
When I finally slid that first slice onto a plate and the pink-to-yellow gradient caught the light, my mom actually gasped. That's when I knew it wasn't about the complexity—it was about how the colors told a story. Watching people hesitate before cutting into something so pretty, then watching their faces when they tasted the soft, vanilla crumb, made all those subtle color calculations worth it.
Ingredients
- All-purpose flour (3 cups): Keep this measured by weight if you can; too much flour makes the cake dense and defeats the whole tender-crumb situation.
- Baking powder (2½ tsp): Don't skip checking the date on this—stale baking powder won't give you that delicate lift you need.
- Unsalted butter (1 cup for batter, 1½ cups for frosting): Room temperature is non-negotiable; cold butter won't cream properly and you'll lose the fluffy structure.
- Granulated sugar (2 cups): Creaming this with butter is where the magic starts; don't rush those 3–4 minutes.
- Eggs (4 large): Room temperature eggs incorporate smoothly and create a more cohesive batter.
- Vanilla extract (1 tbsp for cake, 2 tsp for frosting): Pure vanilla makes a noticeable difference in the final flavor depth.
- Whole milk (1 cup): The alternating method with flour keeps the batter silky and prevents overdevelopment of gluten.
- Gel food coloring (pink and yellow): Gel is far superior to liquid because it won't thin your batter or frosting like water-based colors do.
- Powdered sugar (5 cups): Sift this before measuring or whisking into buttercream to prevent lumps that ruin the smooth finish.
- Milk or heavy cream (3–4 tbsp for frosting): Heavy cream creates silkier frosting, but milk works fine if that's what you have.
Tired of Takeout? 🥡
Get 10 meals you can make faster than delivery arrives. Seriously.
One email. No spam. Unsubscribe anytime.
Instructions
- Prep your pans and oven:
- Preheat to 350°F (175°C) and grease three 8-inch round pans with parchment paper rounds; this seems fussy until you're trying to flip a hot cake and it sticks. Trust the parchment.
- Build your dry mixture:
- Whisk flour, baking powder, and salt together in a medium bowl—this distributes the leavening evenly so you don't get dense pockets in your finished cake.
- Cream butter and sugar:
- Beat on medium speed for a full 3–4 minutes until the mixture is pale and fluffy; you're incorporating tiny air bubbles that become the cake's crumb structure. When it looks like wet sand, you're getting close. When it's pale and pillowy, you're done.
- Add eggs one at a time:
- After each egg, beat until fully combined before adding the next one; this prevents a curdled-looking batter that bakes up uneven. Vanilla goes in with the last egg.
- Alternate flour and milk:
- Start and end with flour (so it's flour, milk, flour, milk, flour), mixing just until combined; overmixing develops gluten and makes the cake tough instead of tender. You want it to look just barely combined.
- Divide and tint:
- Split batter into three bowls and add pale pink to one, pale yellow to another, and leave the third plain or add a tiny drop of both colors for peach. Start with just a toothpick dab of gel coloring; you can always add more, but you can't take it out.
- Bake with confidence:
- Pour each color into its prepared pan, smooth the tops, and bake for 22–26 minutes until a toothpick comes out clean with just a few moist crumbs. The tops should spring back when you gently touch them.
- Cool strategically:
- Let cakes rest in the pans for 10 minutes so they set slightly, then turn them out onto wire racks to cool completely; rushing this step can cause cracking. Cool to room temperature before frosting.
- Make your frosting:
- Beat softened butter until creamy, then gradually add sifted powdered sugar, vanilla, salt, and 3 tbsp milk/cream, beating until fluffy and spreadable. Add more milk a tablespoon at a time if it's too stiff.
- Color your frosting layers:
- Divide frosting into three bowls and tint to match your cakes—pale pink, pale yellow, and plain. The frosting should be slightly lighter than the cake layers so the colors read clearly.
- Level and layer:
- If your cakes domed slightly during baking, trim the tops level with a serrated knife so they stack evenly. Place the yellow cake layer on your serving plate, spread with yellow frosting, then add the peach or plain layer with plain frosting, then top with the pink layer.
- Create the ombre magic:
- Frost the top of the pink layer, then use a cake scraper or offset spatula to blend frosting on the sides, transitioning from yellow at the base to pink at the top by using each colored frosting strategically. Work slowly and let the colors overlap naturally instead of trying to make a sharp line.
- Final touches and setting:
- Decorate with pastel sprinkles, edible flowers, or fresh berries, then chill the finished cake for at least 30 minutes before slicing; the cold frosting helps you get clean cuts. A warm knife dipped in hot water between slices also helps.
 Save to Pinterest
 The moment that stuck with me was watching my sister carry that cake into her engagement party like it was made of spun sugar and wishes. People actually paused before cutting into it, and that hesitation—that respect for something beautiful—made me understand why cakes matter beyond just tasting good. They're edible art that you get to share.
The Ombre Technique Explained
The ombre effect isn't about being a frosting master; it's about understanding color placement and letting the spatula do gentle blending work. Start by frosting the top of your cake with the darkest color, then work the sides with all three frostings, using vertical strokes and letting the colors meet and blend naturally. Think of it like watercolor painting—you're creating a gradient, not painting with a ruler. The prettiest ombres happen when you don't overthink it.
Storage and Make-Ahead Strategy
This cake actually improves on day two as the flavors settle and the crumb becomes more tender from moisture redistribution in the frosting. You can bake the layers a day ahead, cool them completely, wrap them individually in plastic wrap, and store them at room temperature or refrigerated. Frost the cake the morning of serving if it's a special occasion, or up to 4 days ahead and refrigerate—just bring it to room temperature about an hour before cutting for the best texture and flavor.
Variations and Personalization
Once you understand this cake structure, the color options expand endlessly. You could do a mint-to-lavender ombre for a different mood, or keep it monochromatic with five shades of one color for a subtler effect. The buttercream frosting takes optional mix-ins beautifully too—a tiny bit of almond extract, lemon zest, or even a whisper of rose water can shift the flavor profile without changing the technique. Some bakers add a light crumb coat, then chill it, then apply the final colored frosting for smoother layers.
- For a richer flavor, substitute buttermilk for the whole milk and add an extra half-teaspoon of vanilla extract.
- If you're decorating with fresh flowers, make sure they're food-safe and pesticide-free, or use high-quality edible flowers from a trusted source.
- A thin metal bench scraper or the edge of an offset spatula works beautifully for blending the ombre—just keep it at a shallow angle and let gravity help.
 Save to Pinterest
 This cake taught me that impressive-looking desserts don't require professional training, just patience and a willingness to experiment with color and texture. The next time someone asks if you can make something beautiful, this is the answer.
Recipe FAQs
- → How can I achieve the ombre gradient effect?
Divide the batter into portions and tint each with varying amounts of pink and yellow gel coloring, then bake in layers. Frost with matching colored buttercream to blend for the ombre look.
- → What is the best way to ensure even cake layers?
Use three 8-inch pans and level each layer after baking. Cooling completely before frosting helps maintain shape and prevents sliding.
- → Can I substitute ingredients to alter flavor or texture?
Yes, substituting buttermilk for milk will add tanginess, and using different extracts can create subtle flavor variations.
- → How should the cake be stored to maintain freshness?
Keep covered at room temperature for up to 1 day or refrigerate up to 4 days to preserve moisture and frosting texture.
- → What tools help achieve a smooth ombre finish?
Using an offset spatula and cake scraper works best to blend the colored buttercream seamlessly along the cake's sides.