 Save to Pinterest
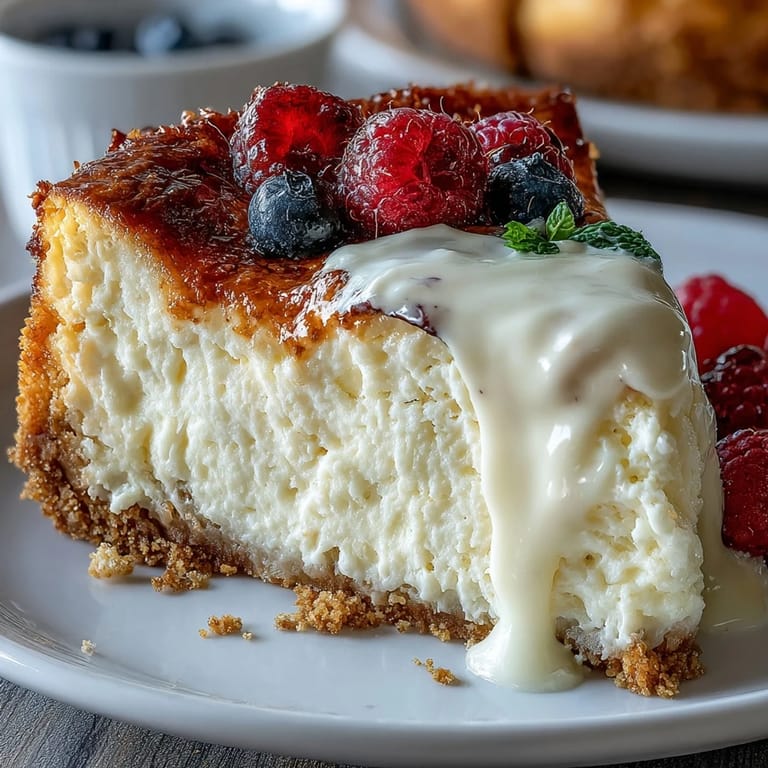
 My sister called me three weeks before her graduation asking if I could bring something special to her celebration dinner. I stood in my kitchen that evening, thinking about how to make something that felt both impressive and manageable, when it hit me—tiny cheesecakes with little diploma picks. The idea made her laugh so hard over the phone that I knew I was onto something. These creamy, buttery bites became the unexpected star of the night, and honestly, they've been requested at every milestone celebration since.
I'll never forget watching my brother's face when he picked up one of these bites at his promotion party—the little diploma pick made him grin like a kid, then his expression shifted to pure delight the moment he tasted the creamy filling. That's when I realized these weren't just desserts; they were tiny moments of joy you could hold in your hand. Since then, I've made them for countless gatherings, and they always seem to spark conversations and laughter.
Ingredients
- Graham cracker crumbs: Use about 8-9 full crackers crushed into fine crumbs; this base needs to be compact enough to hold the filling without crumbling when you press it down.
- Granulated sugar (for crust): Just 2 tablespoons adds sweetness without making the crust greasy or overly sugary.
- Unsalted butter, melted: Warm butter helps the crust bind together beautifully; make sure it's fully melted but not hot.
- Cream cheese, softened: This is non-negotiable—pull it from the fridge 30 minutes early so it beats into a smooth, lump-free mixture.
- Granulated sugar (for filling): Half a cup creates that perfect balance between sweetness and the tanginess of cream cheese.
- Egg: One large egg is the binder that helps the filling set without making it dense; don't skip this.
- Vanilla extract: Pure vanilla tastes noticeably better than imitation, especially in something this simple and cream-forward.
- Sour cream: This adds richness and a subtle tang that keeps the cheesecake from tasting one-dimensional.
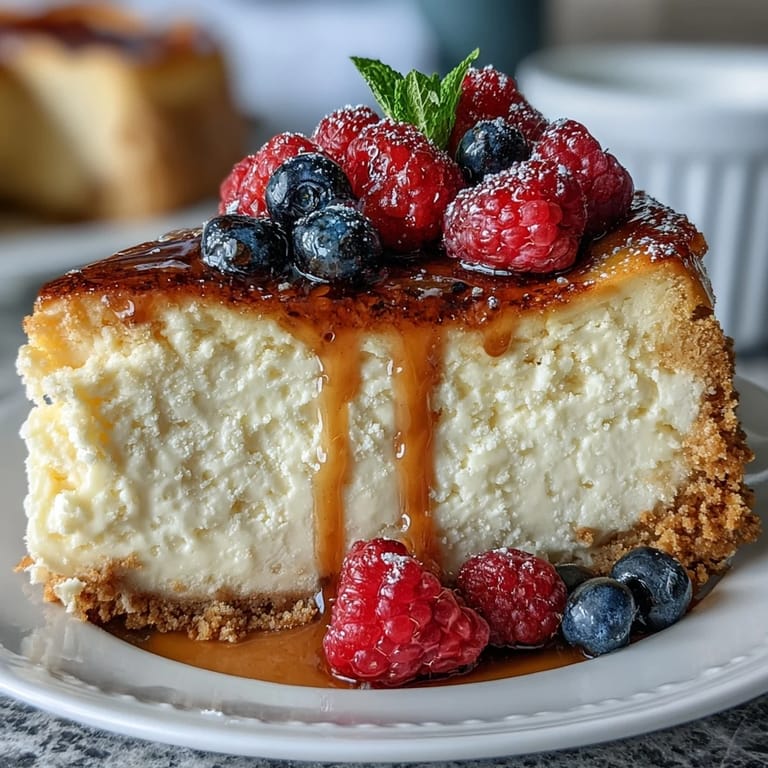
- Fresh mixed berries: Dice them small so they nestle into the top without rolling off; blueberries and raspberries are my go-to combo.
- Fruit preserves (optional): A thin brush of warmed preserves gives the berries a professional shine and adds a hint of extra flavor.
- Diploma picks: Hunt these down from party supply stores or make your own from cardstock and twine for a personal touch.
Tired of Takeout? 🥡
Get 10 meals you can make faster than delivery arrives. Seriously.
One email. No spam. Unsubscribe anytime.
Instructions
- Set the stage:
- Preheat your oven to 325°F and line a 24-cup mini muffin pan with paper liners; this temperature is gentle enough to bake the cheesecakes evenly without cracking.
- Build the crust:
- Mix graham cracker crumbs, 2 tablespoons sugar, and melted butter in a bowl until it resembles wet sand, then press about 1 teaspoon of the mixture firmly into each liner. You want it compact and level, not loose and crumbly.
- Pre-bake the base:
- Bake the crusts alone for 5 minutes just to set them, then pull them out and let them cool while you move on to the filling.
- Create the filling:
- Beat softened cream cheese and sugar together until it's completely smooth with no lumps—this takes a few minutes and is worth the patience. Gently blend in the egg, vanilla, and sour cream until just combined; overmixing can whip air into the filling and cause cracking.
- Fill and bake:
- Spoon about 1 tablespoon of cheesecake filling over each crust, smoothing the tops slightly, then bake for 13 to 15 minutes until the centers look just barely set but still have a tiny jiggle when you gently shake the pan. This jiggle is your signal they're perfectly creamy inside.
- Cool with care:
- Let them sit in the pan for 15 minutes to set gently, then transfer them to a wire rack and let them finish cooling to room temperature before refrigerating.
- Chill and finish:
- Refrigerate for at least 1 hour—this is when the flavors settle and the texture becomes that dreamy, creamy consistency. Just before serving, top each bite with a few berries and insert a diploma pick for the celebration moment.
 Save to Pinterest
 There's something unexpectedly touching about watching someone pick up one of these tiny cheesecakes—they pause at the little diploma pick, their face lights up, and suddenly it's not just about the dessert anymore. It becomes a moment of acknowledgment, a small way of saying their achievement matters to you.
Flavor Variations Worth Trying
Once you nail the classic version, start experimenting—I've added lemon zest to a batch and the brightness cut through the richness beautifully. A drizzle of dark chocolate or a swirl of salted caramel on top elevates them instantly. Berry compote mixed into the filling itself (just a couple of tablespoons) gives you a subtle flavor boost without overcomplicating things.
Make-Ahead and Storage Tips
The beauty of these bites is their flexibility—bake them the day before, skip the berries and picks, and store them in an airtight container in the fridge. They'll keep perfectly for three days. On serving day, just add your fresh toppings and the picks for that wow factor. I've even frozen the unfilled crusts and filling separately, then assembled them fresh the morning of a party.
Celebration Ready
These cheesecake bites have a way of turning any gathering into something memorable. They're small enough that people feel free to grab seconds without guilt, but fancy enough that they feel special. The little diploma picks do the heavy lifting on presentation, so you can focus on enjoying the moment instead of fussing in the kitchen.
- Make the bites a day ahead and you'll have zero stress on celebration day.
- If you can't find diploma picks, unfold a paperclip and slide a small flag of cardstock through it for a DIY version.
- Set up a little topping bar with extra berries and picks so guests can customize their own if you're feeling adventurous.
 Save to Pinterest
 These tiny cheesecakes remind me that sometimes the smallest gestures carry the biggest meaning. Make them whenever someone deserves a celebration.
Recipe FAQs
- → What kind of crust is used for these cheesecake bites?
A buttery graham cracker crust forms the base, combining crumbs with sugar and melted butter for a firm yet tender texture.
- → How long should the cheesecake bites chill before serving?
They require at least one hour of refrigeration to set properly and develop creamy consistency.
- → Can I use alternative toppings for these bites?
Yes, fresh mixed berries are traditional, but you can also add fruit preserves for shine or try other fruits based on preference.
- → Are there gluten-free options for the crust?
Gluten-free graham crackers can be substituted to make the crust gluten-free without sacrificing flavor.
- → What is the best way to bake the crust for these bites?
Press the crust mixture firmly into mini cupcake liners and bake at 325°F (160°C) for 5 minutes before adding the filling.
- → How do the diploma picks enhance the presentation?
They add a festive, graduation-themed touch, making each bite perfect for celebrations and easy to serve.